 how-to
How to Reconstitute Lyophilized Peptides Step by Step
Table of Contents
- What You'll Need Before You Start
- How to Reconstitute Lyophilized Peptides Step by Step
- Peptide Dosage Calculation Guide: Units, Concentration, and Draw Volume
- Bacteriostatic Water for Peptide Reconstitution: Why It Is the Standard Diluent
- How to Store Reconstituted Peptides Without Losing Potency
- Troubleshooting Peptide Reconstitution: Cloudy Solutions, Vacuum, and Visual Checks
- Common Mistakes to Avoid When Reconstituting Peptides
- Conclusion
- Frequently Asked Questions
Last Updated: September 19, 2026
What You'll Need Before You Start
Getting the right kit together first makes the whole process calmer and cleaner.
Here's what belongs on your bench:
- Lyophilized peptide vial (the freeze-dried powder)
- Bacteriostatic water as your diluent
- Alcohol swabs for sanitising
- Insulin syringes (small gauge, 29-31G)
- Sterile gloves and a clean surface
- A sharps container for safe disposal
Lyophilized peptides are freeze-dried proteins stored as a stable powder, lasting far longer than in liquid. Give the vial 15-20 minutes to reach room temperature before opening it, since cold glass pulls in moisture that degrades the powder.
How to Reconstitute Lyophilized Peptides Step by Step
Learning how to reconstitute lyophilized peptides step by step comes down to three careful stages: warm the vial, add the solvent slowly, and mix gently. What separates a clean reconstitution from a spoiled one is pressure management and needle placement, not speed.
Step 1: Prepare the Workspace and Equilibrate the Vial
Wipe the bench with alcohol and lay out every item before you touch the peptide. Let the vial sit at room temperature for 15-20 minutes so it fully equilibrates.
Clean air and a still surface matter more than fancy equipment. Keep windows closed and pets away, wash your hands, then put on sterile gloves. Work on a non-porous surface such as stainless steel or a clean plastic tray, because fabric and wood harbour particles that can drift into an open vial.
Before you puncture anything, inspect the lyophilized powder through the glass. A healthy cake is a solid, uniform plug, often white or off-white. Warning signs include:
- Cracks, shrinkage, or a cake that has pulled away from the glass wall
- A melted or syrupy appearance instead of a dry solid
- Discolouration, dark specks, or a cloudy film on the inside of the glass
- A rubber stopper that looks degraded, cracked, or partially pushed in
If you see any of these, do not reconstitute the vial. A compromised cake is a compromised batch.
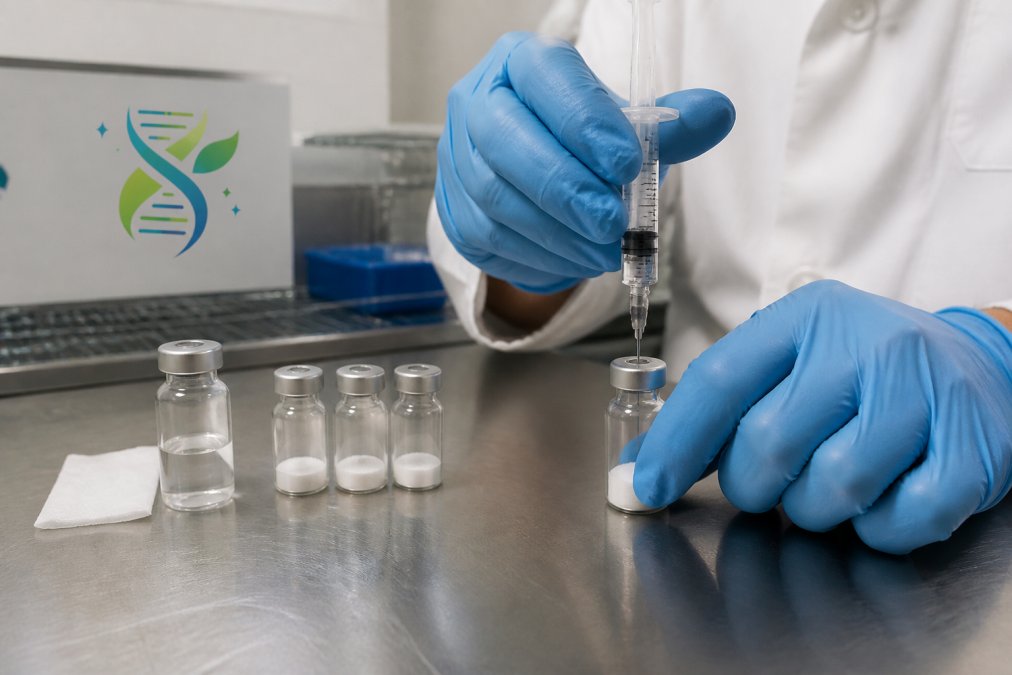
Step 2: Swab the Rubber Stopper and Draw the Diluent
Swab the rubber stopper with a fresh alcohol pad and let it air-dry for a few seconds. Do not fan it or blow on it; air-drying is what actually kills surface bacteria.
Draw your chosen volume of bacteriostatic water into the syringe. Hold the vial upside down and keep the needle tip below the liquid line so you draw solution, not air. Tap the barrel to float any bubbles to the top, then push them back into the vial before you withdraw.
Push the needle through the stopper at a slight angle, roughly 45 degrees, then straighten it once through. This keeps the hole small and the seal tight, since every puncture enlarges the channel through the rubber.
If the vial is sealed under negative pressure, you will feel the plunger get pulled in as soon as the needle pierces the stopper. This is normal.
Step 3: Add the Solvent Slowly and Mix Without Shaking
Once dissolved, hold the vial against a light source and inspect it. A properly reconstituted solution is clear and free of floating specks. A faint tint matching the peptide's natural colour is normal. Cloudiness that does not clear after gentle swirling, visible particles, or a film on the glass all mean the vial should be discarded.
Step 4: Equalise Pressure and Store Immediately
After mixing, the vial is under slight positive pressure from the air you injected, which actually helps with future draws. Wipe the stopper once more with a fresh alcohol pad before you put the vial away.
Peptide Dosage Calculation Guide: Units, Concentration, and Draw Volume
Here is the formula:
Concentration (mg/mL) = Peptide mass (mg) ÷ Diluent volume (mL)
From there, work out your draw volume:
Draw volume (mL) = Target dose (mg) ÷ Concentration (mg/mL)
| Vial Size | Diluent Added | Concentration | Draw for 0.5 mg | Draw for 1 mg |
|---|---|---|---|---|
| 2 mg | 1 mL | 2 mg/mL | 0.25 mL | 0.5 mL |
| 5 mg | 2 mL | 2.5 mg/mL | 0.2 mL | 0.4 mL |
| 5 mg | 1 mL | 5 mg/mL | 0.1 mL | 0.2 mL |
| 10 mg | 2 mL | 5 mg/mL | 0.1 mL | 0.2 mL |
| 10 mg | 1 mL | 10 mg/mL | 0.05 mL | 0.1 mL |
Converting Millilitres to Insulin Syringe Units
Insulin syringes are marked in units, where 100 units equals 1 mL. This is the most common source of dosing errors, because the number on the barrel is not the number of millilitres.
To convert, multiply millilitres by 100:
- 0.05 mL = 5 units
- 0.1 mL = 10 units
- 0.2 mL = 20 units
- 0.25 mL = 25 units
- 0.4 mL = 40 units
- 0.5 mL = 50 units
Choosing a Diluent Volume That Makes the Math Easy
You are not locked into a fixed diluent volume. Pick one that makes your target dose land on a clean unit mark.
Double-Checking Before Every Draw
Run the same three checks before every draw:
- Confirm the concentration on your vial label matches your calculation.
- Confirm the unit mark you are drawing to matches the millilitre volume you calculated.
- Confirm the syringe barrel size, because a 0.3 mL and a 1 mL syringe look similar at a glance.
A misplaced decimal is the most common error we see, so write the concentration on tape and stick it to the vial.
Bacteriostatic Water for Peptide Reconstitution: Why It Is the Standard Diluent
Bacteriostatic water for peptide reconstitution is the standard diluent because it contains a small amount of benzyl alcohol that stops bacteria from growing. That single additive lets a mixed vial stay usable for weeks instead of days.
How to Store Reconstituted Peptides Without Losing Potency
How to store reconstituted peptides correctly comes down to three things: cold, dark, and still. Light, heat, and agitation all break peptide bonds over time.
A few habits protect potency:
- Store vials upright, not on their side
- Keep them in the original box to block light
- Avoid the fridge door, where temperatures swing
- Never freeze a reconstituted solution
Troubleshooting Peptide Reconstitution: Cloudy Solutions, Vacuum, and Visual Checks
A cloudy solution usually means too much force, the wrong solvent, or a peptide that simply won't fully dissolve. Most cases trace back to how the liquid was added.
Here's how to read the common problems:
| Problem | Likely Cause | Fix |
|---|---|---|
| Cloudy solution | Shaking or fast solvent | Swirl gently, wait, re-check |
| Vacuum pulls syringe | Sealed negative pressure | Inject air first to equalise |
| Powder won't dissolve | Wrong solvent | Switch to saline if advised |
| Particles floating | Contamination | Discard the vial |
Common Mistakes to Avoid When Reconstituting Peptides
The same handful of errors show up again and again. A common mistake is spraying solvent directly onto the powder cake, which blasts the peptide apart and traps air.
Other slips to watch:
- Shaking instead of swirling
- Skipping the alcohol swab on the stopper
- Using cold solvent straight from the fridge
- Reusing a needle for a second vial
- Storing the mixed vial on the fridge door
Conclusion
Reconstituting peptides rewards patience more than speed. Warm the vial, add the solvent slowly, swirl without shaking, and store it cold and dark. Get those basics right and your compound stays stable and your results stay consistent.
Frequently Asked Questions
How much bacteriostatic water should I add to reconstitute a lyophilized peptide?
The volume depends on the vial's peptide mass and the concentration you need. A common approach is to add 1 to 2 mL of bacteriostatic water to a small vial, which makes the math simple: a 5 mg vial mixed with 1 mL gives 5 mg/mL, and a 10 mg vial mixed with 2 mL gives the same concentration. Always record the exact volume you used so your dosage calculation stays consistent across experiments.
What is the difference between sterile water and bacteriostatic water for reconstitution?
Sterile water contains no preservative, so it is intended for single-use applications and any leftover solution should be discarded. Bacteriostatic water contains 0.9% benzyl alcohol, which slows bacterial growth and allows multiple draws from the same vial over a short period. For most lyophilized research peptides, bacteriostatic water is the standard choice because it supports repeated use and helps maintain stability.
Why did my reconstituted peptide turn cloudy, and what should I do?
Cloudiness usually points to one of three causes: the solvent was added too quickly, the solution was shaken instead of swirled, or the peptide is not fully soluble in the chosen diluent. Let the vial sit at room temperature and swirl gently for a few minutes. If the cloudiness persists, the peptide may require a different solvent, such as sterile saline, rather than bacteriostatic water.
How should reconstituted peptides be stored to maintain stability?
Most reconstituted peptides should be refrigerated at 2 to 8 degrees Celsius and kept away from light. Use a consistent storage location and avoid repeated temperature swings, which can speed up degradation.