 how-to
Step-by-Step Guide to Peptide Purity Testing
Table of Contents
- What You'll Need Before You Start Testing
- Step 1: How to Read a Peptide COA
- Step 2: The Importance of Third Party Testing
- Step 3: HPLC Analysis for Peptides
- Step 4: Interpreting Mass Spectrometry Results
- Step 5: Independent Verification Workflow
- Common Mistakes to Avoid in Peptide Purity Testing
- Conclusion
- Frequently Asked Questions
Last Updated: September 29, 2026
What You'll Need Before You Start Testing
Peptide purity testing is the process of confirming that a peptide product contains exactly what its label claims, at the concentration and purity level stated. The numbers here are sobering: research suggests up to 25% of peptide products in the unregulated market may fail to meet quality standards (Vanguard Laboratory's guide to HPLC testing), and some products test as low as 60% pure (Innerbody's beginner's guide to peptide therapy).
Before you run a single test, gather these basics:
- The product's Certificate of Analysis (COA)
- The batch ID and lot number from the vial label
- Access to an independent analytical laboratory
- A basic understanding of HPLC and mass spectrometry reports
Step 1: How to Read a Peptide COA
A Certificate of Analysis is a document from the manufacturer or a testing lab that reports the measured purity, identity, and composition of a specific batch. It should include the test method, the result, and the date. If any of those are missing, treat the COA as incomplete.
Identifying Batch ID and Lot Number
The batch ID and lot number must match your vial exactly. A COA without a traceable batch ID tells you nothing about the product in your hand. Check the numbers character by character. A single digit difference is a red flag, not a typo.
Spotting Red Flags in Purity Percentages
Research-grade peptides are generally expected to maintain an HPLC purity level of 99% or higher (Durham Peptides' guide to verifying peptide quality). Anything below 95% deserves scrutiny. Watch for COAs that list purity without showing the actual chromatogram or test method.
Step 2: The Importance of Third Party Testing
Third-party testing means an independent lab, with no ties to the manufacturer, runs the analysis. This matters because in-house testing can be adjusted, cherry-picked, or skipped entirely. Independent verification through HPLC and mass spectrometry is now standard practice across the industry (Peptides Lab UK on COA verification).
Step 3: HPLC Analysis for Peptides
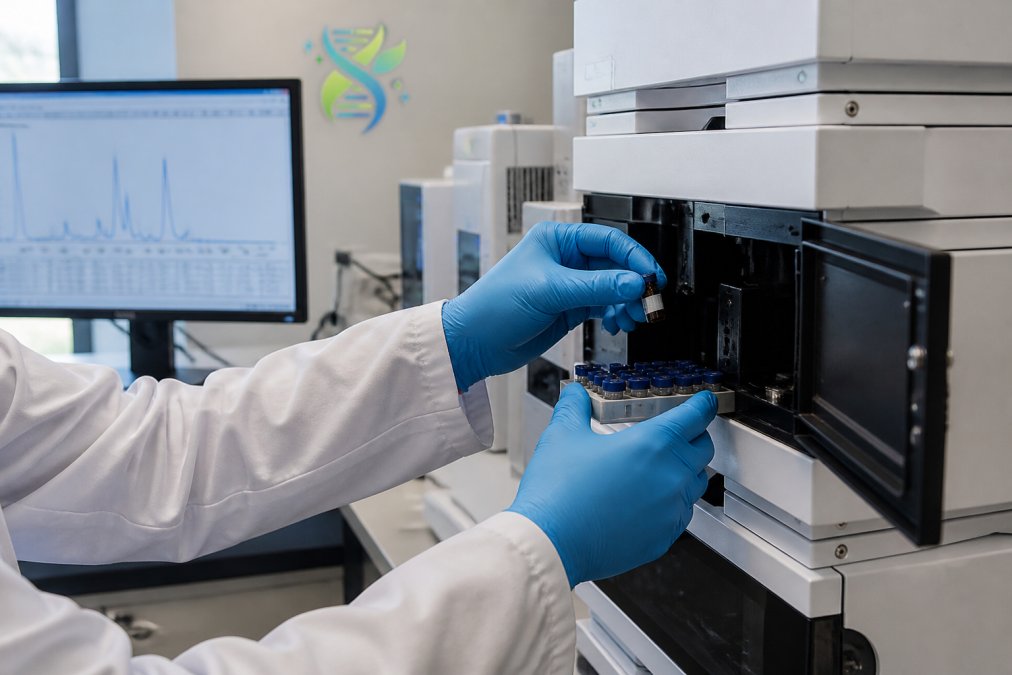
High-Performance Liquid Chromatography (HPLC) separates the components of a sample based on how they interact with a solid phase and a liquid mobile phase. The result is a chromatogram: a graph with peaks that represent different compounds. The main peak is your target peptide. Smaller surrounding peaks are impurities.
Understanding Retention Time and Peak Integration
Retention time is how long a compound takes to exit the column. It acts as a fingerprint: if your target peptide's retention time doesn't match the reference standard, something is wrong. Peak integration measures the area under each peak, which translates directly into purity percentage.
| HPLC Metric | What It Tells You | Red Flag |
|---|---|---|
| Retention time | Compound identity | Mismatch with standard |
| Peak area | Purity percentage | Main peak below 95% |
| Baseline noise | Detection limits | Excessive noise hides impurities |
| Impurity peaks | Contaminants present | Multiple large secondary peaks |
Step 4: Interpreting Mass Spectrometry Results
Mass spectrometry (MS) confirms molecular identity. Where HPLC tells you how much of your sample is the target compound, MS tells you whether that compound is actually the peptide you ordered. Every peptide has a known theoretical mass, and the measured mass should match it within a tight tolerance, typically a fraction of a Dalton for a small peptide.
How the Measurement Actually Works
Most peptide labs use electrospray ionisation (ESI) coupled to a mass analyser. The sample is sprayed into a charged mist, solvent evaporates, and the peptide picks up one or more protons, becoming an ion. The instrument then measures the mass-to-charge ratio (m/z) of each ion.
Reading the Spectrum Step by Step
- Locate the base peak, the tallest signal, and note its m/z value.
- Identify the charge state. Adjacent peaks in a cluster usually differ by one charge; the spacing between them reveals the charge (z).
- Calculate the neutral mass using the standard formula: neutral mass = (m/z × z) − (z × proton mass).
- Compare the calculated neutral mass against the theoretical mass printed on the COA.
- Check for adducts. Sodium and potassium adducts commonly appear 22 and 38 Daltons above the expected mass and are normal, not a failure.
What a Passing Result Looks Like
A passing spectrum shows a clean cluster of peaks whose calculated neutral mass matches the theoretical value within the stated tolerance. Minor adduct peaks are acceptable. What matters is that the dominant signal resolves to the correct mass.
What a Failing Result Looks Like
A failing spectrum shows a dominant peak that resolves to the wrong mass, a cluster that cannot be reconciled with any sensible charge state, or a mass that matches a different peptide entirely. A sample can be 99% pure by HPLC and still fail MS, purity and identity are separate checks, and passing one says nothing about the other.
Common Red Flags in MS Reports
- A reported mass that matches the theoretical value to an implausible number of decimal places
- No charge state information anywhere on the report
- A spectrum image that is too low-resolution to read the axis labels
- Adduct peaks labelled as impurities, or impurities labelled as adducts
- A molecular weight that does not correspond to the peptide sequence stated on the label
When you request independent testing, ask specifically for the raw spectrum file, not just a summary table. The raw data is what lets a second lab reproduce the result.
Step 5: Independent Verification Workflow
Most guides stop at 'send it to a lab.' That is the easy part. The hard part is running a submission that produces a result you can actually rely on, and that means controlling the chain of custody from the moment you pull the sample to the moment you compare reports.
Before You Ship: Selecting the Right Laboratory
Not every lab is equipped for peptide work, and accreditation is not the same as competence. Look for:
- Accreditation to ISO/IEC 17025, which covers testing and calibration laboratories
- A published scope of accreditation that explicitly includes HPLC and mass spectrometry
- Experience with synthetic peptides specifically, not just small molecules
- Willingness to accept blinded samples and return raw data files
The Full Independent Verification Workflow
- Pull a random sample. Do not send the vial you have been handling. Select from the batch at random so the sample is representative.
- Document everything before it leaves your hands. Photograph the vial, the label, the batch ID and the lot number. Record the date and the sampler's name.
- Assign a blind identifier. Replace the supplier's label with a neutral code. Keep the mapping between code and supplier in a separate, sealed record.
- Ship under chain-of-custody documentation. Include a submission form listing the tests requested and the storage conditions. Use tracked shipping and note the temperature requirements, many peptides degrade outside a controlled range.
- Request the full test panel. At minimum: HPLC purity, MS identity, and a water content or residual solvent check where relevant. Ask for raw chromatograms and raw spectra, not summaries.
- Receive and reconcile. Compare the independent COA against the manufacturer's COA line by line: purity percentage, retention time, molecular weight, and method used.
- Flag deviations. A purity gap of more than 2 percentage points, a different retention time, or a molecular weight outside tolerance all warrant a formal query to the supplier.
- Retain the records. Keep the sealed mapping, the shipping documentation and both COAs together. If a result is ever disputed, this file is your evidence.
Reconciling a Disputed Result
If the independent result contradicts the manufacturer's COA, do not assume fraud immediately. Common innocent explanations include a different HPLC method, a different column, or a different integration threshold. Ask the supplier for their raw data and compare methods side by side. If the methods match and the results still diverge, escalate.
Counterfeit and Manipulated COA Indicators
Beyond checking the batch number, look for these specific signs that a COA has been altered or fabricated:
- Inconsistent typography. Fonts, weights or spacing that shift mid-document usually mean text was edited after the fact.
- Mismatched dates. A test date that predates the manufacturing date, or a report date that falls on a weekend when the lab is closed.
- Unverifiable lab identity. The lab name does not resolve to a real facility, a real accreditation number, or a real contact.
- Recycled chromatograms. The same chromatogram image appearing across multiple batches or products.
- Missing method detail. No column type, no mobile phase, no flow rate, no detector wavelength.
- Round numbers. Purity reported as exactly 99.0% across every batch is a pattern worth questioning.
Research-Grade Versus Clinical-Grade Standards
At Everform Research, every batch ships with third-party COA verification, cGMP-compliant manufacturing documentation and raw data on request, the baseline our quality program is built on. Use code EVER15 for 15% off your first order.
Common Mistakes to Avoid in Peptide Purity Testing
The biggest mistake is trusting a COA without checking the batch ID against your vial. Second is accepting a purity number without seeing the chromatogram. Third is skipping independent verification because the manufacturer's paperwork looks professional.
Conclusion
Reproducible research depends on knowing exactly what's in your vial. Most suppliers won't show you the raw data. Everform Research will. Every compound we ship comes with third-party COA verification, cGMP-compliant manufacturing, and clear documentation you can hand straight to your compliance team. Use code EVER15 for 15% off your first order and see what transparent quality looks like.
Frequently Asked Questions
How to test peptides for purity?
Testing peptide purity involves a multi-step process. First, review the Certificate of Analysis (COA) for the batch, checking the HPLC purity percentage and mass spectrometry data. Next, verify the batch ID and lot number. The most reliable method is to send a sample to an independent, accredited third-party laboratory for HPLC and mass spectrometry analysis. This confirms the peptide's identity and purity, ensuring it meets the ≥99% standard for research-grade material.
What purity should my peptides be?
For research applications, the industry consensus for research-grade peptides is an HPLC purity level of ≥99%. Some products on the unregulated market may have purity as low as 60%, and up to 25% may fail to meet quality standards. A purity of 98% is generally considered good, but for reproducible experiments, aiming for ≥99% is recommended to minimize the impact of impurities on your results.
What is the industry standard for acceptable peptide purity?
The accepted standard for research-grade peptides is an HPLC purity of ≥99%. This level ensures that the peptide is suitable for sensitive experiments where impurities could skew data. While 95-98% purity might be acceptable for some non-critical applications, the gold standard for reliable research is 99% or higher, as verified by independent third-party testing.
How can researchers identify fraudulent or inaccurate purity reports?
To spot fraudulent COAs, look for inconsistencies. Check if the batch ID and lot number match the product vial. Verify the testing laboratory's accreditation and contact them directly if possible. Be wary of COAs that lack raw data, such as the actual chromatogram or spectra. Red flags include purity percentages that seem too perfect, missing molecular weight data, or a lab that cannot be independently verified.
Consistent results start with verified compounds. Everform Research pairs rigorous third-party testing with cGMP-compliant manufacturing and documentation you can actually submit to procurement. Get started with Everform Research and shop compounds backed by real quality signals, not marketing claims.