 how-to
How to Reconstitute Research Peptides Safely
Table of Contents
- What Peptide Reconstitution Means and Why It Matters
- Supplies and Solvent Selection for Safe Reconstitution
- Peptide Reconstitution Instructions: Step-by-Step Process
- Research Peptide Storage and Stability Management
- Peptide Handling Precautions and Contamination Prevention
- How to Tell if Peptides Have Gone Bad
- Common Mistakes to Avoid During Reconstitution
- Frequently Asked Questions
Last Updated: October 17, 2026
What Peptide Reconstitution Means and Why It Matters
Peptide reconstitution is the process of mixing a freeze-dried peptide powder with a liquid solvent to create a usable solution; to reconstitute research peptides properly requires care, precision, and the right technique.
This step directly affects your results: a poorly reconstituted peptide can lose potency, become contaminated, or degrade faster than it should.
At Everform Research, we know reconstitution quality shapes everything downstream, so this guide walks you through safe, reliable techniques that protect your compounds and your research integrity.
The process isn't complicated, but it requires care: delicate amino acid chains break down when exposed to heat, light, or rough handling. A gentle approach and clean technique make all the difference.
Supplies and Solvent Selection for Safe Reconstitution
Gather the right materials first, having everything ready prevents rushed decisions and contamination risks.
Essential supplies include:
- Sterile syringes (1 mL to 10 mL, depending on your volume)
- Sterile needles (25-gauge or smaller)
- Nitrile gloves (latex-free to avoid allergic reactions)
- Isopropyl alcohol wipes (70% concentration)
- Your chosen diluent (bacteriostatic water or sterile water)
- A clean, flat workstation away from air currents
- Paper towels or lint-free wipes
Choosing Between Bacteriostatic Water and Sterile Water
Bacteriostatic water contains benzyl alcohol as a preservative, preventing bacterial and fungal growth in multi-use vials drawn from over weeks or months.
Sterile water has no preservative and suits single-use vials consumed in one session; once opened it offers no protection against contamination over time, so it works best for immediate application.
The choice depends on your workflow. Multi-session researchers should use bacteriostatic water. Single-dose applications can use sterile water. Both are widely available from research suppliers and medical distributors.
Essential Equipment and Workspace Setup
A clean, organised workspace reduces contamination risk and keeps your peptides stable.
Set up your workspace like this:
- Use a flat, clean table or bench away from windows and air vents
- Wipe the surface with an alcohol-based disinfectant and let it dry
- Keep your supplies within arm's reach so you don't leave your workspace mid-process
- Ensure good lighting so you can see what you're doing clearly
- Avoid areas with high foot traffic or air currents that might introduce dust
A laminar flow hood is ideal but not essential for most research settings; the key is minimising airborne particles and dust settling on your vial or needle.
Peptide Reconstitution Instructions: Step-by-Step Process
Follow these steps in order. Rushing or skipping steps increases contamination risk and peptide degradation.
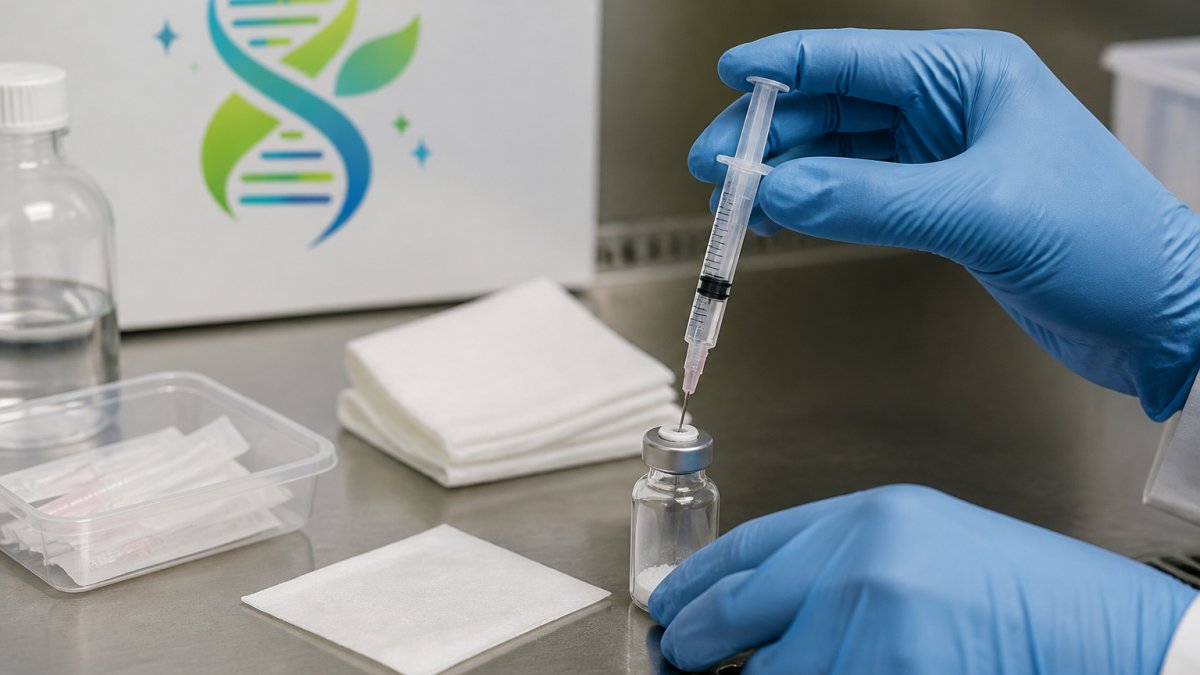
Preparing Your Workspace and Practising Aseptic Technique
Step 1: Prepare your workspace
Clean your work surface with an alcohol wipe and let it dry completely (about 30 seconds).
Step 2: Put on gloves
Nitrile gloves bar bacteria and skin oils. Ensure they're snug with no tears, and change them immediately if you touch your face, hair, or clothes.
Step 3: Inspect your peptide vial
Under good light, the powder should be white or off-white, dry, and free of clumps or discolouration.
Step 4: Wipe the vial stopper
Adding Diluent and Gentle Mixing
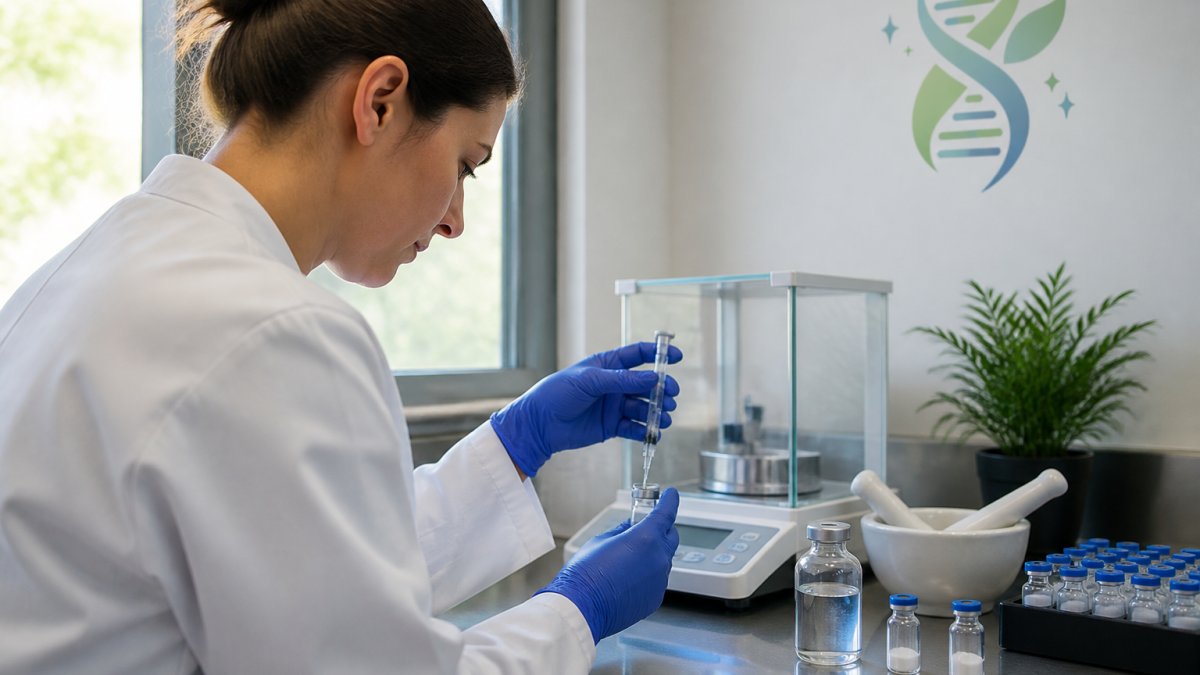
Step 5: Draw your diluent into the syringe
Step 6: Insert the needle into the vial
Hold the vial steady and insert the needle through the rubber stopper at a slight angle, straightening once through.
Step 7: Add the diluent slowly
Push the plunger gently and steadily so the diluent flows in over 10-15 seconds. Slow addition prevents clumping and reduces foam.
Step 8: Remove the syringe and let it sit
Withdraw the needle and syringe, then leave the vial undisturbed for 5 minutes so the peptide fully dissolves and air bubbles rise to the surface.
Step 9: Mix gently by swirling
After 5 minutes, swirl the vial gently between your palms in smooth, slow rotations, like warming a brandy snifter.
Research Peptide Storage and Stability Management
Once reconstituted, your peptide solution needs proper storage. Temperature, light, and moisture are the main enemies, but conditions vary by compound, treat the guidance below as a framework and always defer to the stability data supplied with your product.
Why Stability Is Compound-Specific
Different peptides degrade by different routes, oxidation at sulfur-containing residues, deamidation at asparagine or glutamine residues, or aggregation when concentration or ionic strength is off; this is why the stability profile matters when you reconstitute research peptides. A shelf life printed for one peptide cannot be transferred to another. Reputable suppliers publish a stability profile per product covering diluent, concentration range, storage temperature, and expected in-solution life; if yours doesn't, ask before you reconstitute.
Refrigerated Storage
Refrigeration at 2-8°C (35-46°F) is the default for most reconstituted peptides intended for short-term use. Use a dedicated research refrigerator, not a kitchen fridge, door openings cause temperature swings and food introduces contamination risk. Keep vials upright in a secondary container, labelled with reconstitution date, diluent, and concentration.
Freezer Storage and Freeze-Thaw Mechanics
Freezing at -20°C (-4°F) or colder slows degradation, but the freeze-thaw cycle itself is damaging: ice crystals shear peptide aggregates and concentrate solutes in ways that promote aggregation. Aliquot before freezing, divide the solution into single-use volumes in sterile, labelled vials so each is thawed once. Thaw gently at refrigerated temperature or by rolling between gloved palms, never in a hot water bath or microwave.
Light and Temperature Excursions
Many peptides are photosensitive: store vials in a dark box or opaque sleeve, away from direct sunlight and UV. Temperature excursions matter too, a vial left on the bench overnight or shipped warm may have degraded even if it looks fine. Record any excursion and, if in doubt, discard rather than risk skewed data.
Reading the Signs of Instability
Cloudiness that won't clear on gentle swirling, visible particles, colour change, or a layer that won't redissolve are all reasons to discard. Document what you saw, the storage history, and the batch number before disposal so your supplier can investigate.
At Everform Research, every product ships with compound-specific handling and stability documentation so you can store your material on evidence rather than guesswork.
Peptide Handling Precautions and Contamination Prevention
Contamination ruins research: a single bacterial or fungal colony can multiply rapidly and destroy an entire batch, and endotoxin introduced during handling can invalidate results even when the solution looks clear. Good technique reduces risk, but understand its limits.
What Aseptic Technique Can and Cannot Guarantee
Aseptic technique minimises the introduction of microorganisms; it does not sterilise a non-sterile workspace and cannot rescue a compromised vial. Working in a clean, draft-free area, wiping surfaces, wearing fresh nitrile gloves, and swabbing stoppers all lower bioburden, but they are risk-reduction steps, not a guarantee of sterility. If your work requires sterility assurance, use a validated laminar flow hood and sterile single-use supplies, and follow your institution's standard operating procedures.
Vial Access Practices
- Swab the rubber septum with 70% isopropyl alcohol before every access and let it air dry (the CDC).
- Use a fresh sterile needle and syringe for each draw; never reuse.
- Never leave a needle in the stopper between uses, as it creates a direct pathway for contamination.
- Keep the vial capped and upright when not in use.
- Avoid touching the needle tip, the syringe hub, or the inside of the cap.
Multi-Use Versus Single-Use Vials
Multi-use vials benefit from a preservative-containing diluent such as bacteriostatic water, which inhibits microbial growth between draws, but preservatives are no substitute for aseptic handling and do not neutralise endotoxin. Single-use vials should be consumed in one session; if you must retain a partial one, transfer the contents to a sterile container with a fresh needle and cap, label it, and use it promptly, never store it with a needle in place.
When to Discard After Suspected Contamination
Discard the vial if you see cloudiness that won't clear, particles, discolouration, mould, an off smell, or a layer that won't redissolve. Also discard if you suspect a breach: a dropped vial, a touched needle tip, an unswabbed stopper, or a solution left at room temperature for an extended period. When in doubt, discard, a lost vial is far cheaper than invalid data.
Spills, Sharps, and Accidental Exposure
- Dispose of needles and syringes in a puncture-resistant sharps container; never recap by hand or place sharps in general waste.
- For chemical or biological spills, absorb with disposable towels, clean the area with an appropriate disinfectant, and dispose of waste according to your institution's procedures.
- After any skin or eye exposure, rinse thoroughly and follow your facility's incident-reporting process; keep the product documentation and batch number available.
At Everform Research, our products are supplied with handling documentation and batch traceability so you can apply these precautions with confidence.
How to Tell if Peptides Have Gone Bad
Visual and olfactory clues reveal when a peptide solution has degraded or become contaminated.
Signs of degradation or contamination include:
- Visible particles, cloudiness, or discolouration (should be clear or slightly cloudy)
- An unusual smell, sour, musty, or chemical odours signal problems
- Mould or visible growth on or near the vial
- Separation of layers or settling that doesn't redissolve with gentle swirling
- Crystallisation or precipitation that wasn't present before
If you observe any of these signs, discard the vial, contaminated or degraded peptides will skew your research data and waste your time.
Document your observations before disposal. If multiple batches show the same issues, contact your supplier. Everform Research investigates quality concerns, our commitment to transparency means we want to know if something went wrong so we can prevent it for other customers.
Common Mistakes to Avoid During Reconstitution
Learning from others' errors saves time and protects your peptides.
Mistake 1: Using non-sterile water or diluent
Always use sterile, research-grade diluent.
Mistake 2: Shaking instead of swirling
Mistake 3: Adding diluent too quickly
Rapid addition causes clumping and foaming, making a uniform solution harder to achieve.
Mistake 4: Skipping the alcohol wipe step
Mistake 5: Storing at room temperature
Peptides degrade faster when warm.
Mistake 6: Reusing needles or syringes
Reused equipment harbours bacteria and introduces contamination. Use sterile, single-use needles and syringes every time.
Mistake 7: Not documenting your process
Record the date, time, diluent used, and storage conditions.
Reconstituting research peptides safely comes down to three principles: cleanliness, gentleness, and precision.
Frequently Asked Questions
How do I properly reconstitute a research peptide?
Reconstituting research peptides involves dissolving lyophilised powder in a sterile solvent using aseptic technique. Start by preparing a clean workspace, wiping the vial stopper with an alcohol wipe, and allowing the vial to reach room temperature. Using a sterile syringe and needle, add the diluent slowly to the vial, then gently swirl (never shake) until the powder fully dissolves. Proper reconstitution ensures the peptide remains stable and suitable for research applications.
What is the difference between bacteriostatic water and sterile water for reconstitution?
Bacteriostatic water contains benzyl alcohol as a preservative, making it suitable for multi-use vials where you'll withdraw doses over time. Sterile water lacks preservatives and is better for single-use applications or when the reconstituted solution will be used immediately. Your choice depends on your experimental protocol and how long the reconstituted peptide needs to remain viable. Always verify compatibility with your specific peptide product.
How can you tell if a research peptide has gone bad?
Signs of peptide degradation include discolouration (yellowing or browning), visible particles or cloudiness in the reconstituted solution, unusual odour, or failure to dissolve completely. Freeze-thaw cycles and improper storage temperatures accelerate breakdown. If your results suddenly become inconsistent or differ significantly from previous batches, contamination or degradation may be the cause. Store peptides in the cold and avoid repeated temperature fluctuations to maintain stability.
What should I check before handling research peptides?
Before handling research peptides, verify the Certificate of Analysis (COA) from third-party testing to confirm purity and identity. Check the expiration date and storage requirements on the label. Inspect the vial for any visible damage or signs of prior opening. Ensure your workspace is clean and you have all necessary supplies: sterile solvent, alcohol wipes, sterile syringes, nitrile gloves, and a biohazard disposal container. Proper preparation prevents contamination and ensures reproducible results.